
Last Updated: November 4, 2026
Quick Summary
To disinfect dog kennels, clean first with hot water and detergent, rinse with clean water, then apply disinfectant at the label dilution and keep the surface visibly wet for the full contact time before letting it air dry. Mix only what you'll use that shift and never combine two concentrates in one bucket.
- Disinfecting before cleaning fails because organic matter blocks disinfectant from reaching germs.
- A 1:32 dilution means 4 ounces of concentrate per gallon of water.
- Contact time is product-specific, so follow the disinfectant label rather than a universal number.
- Porous surfaces like wood and unsealed concrete dry fast, so reapply during contact time.
- Keep dogs out until surfaces are fully dry to protect them from chemical residue.
Table of Contents
- The Cleaning Sequence That Actually Kills Pathogens
- Kennel Disinfectant Dilution: Getting the Math Right
- Kennel Disinfection Contact Time: Why Wet Matters
- Choosing a Disinfectant for Kennel Cough and Other Pathogens
- Your Dog Kennel Cleaning Checklist for Every Shift
- Building a Dog Kennel Sanitation SOP Your Staff Will Follow
- Safety for Dogs, Staff, and the Environment
- Put Your Cleaning Protocol in Writing With a Ready-Made SOP
- Frequently Asked Questions
The Cleaning Sequence That Actually Kills Pathogens
A cleaning order that looks right can still leave pathogens alive. If you want to know how to clean and disinfect dog kennels properly, the sequence matters more than the product. The same gap shows up again and again: people disinfect first and clean second. That order fails every time.
Disinfection is the process of reducing pathogens on a surface to a level that won't spread disease. It only works on a clean surface. Organic matter, meaning feces, urine, hair, food, and bedding dust, blocks disinfectant from reaching the germs underneath. The CDC guidance on cleaning and disinfecting pet supplies is blunt about this: clean first, then disinfect, and always follow the product label.
Here is the sequence that works, in three steps.
Step 1: Clear the Kennel and Remove Organic Debris
Empty the kennel completely. Remove the dog, bedding, bowls, toys, and any movable equipment. Scrape and bag all feces, hair, and food waste before anything gets wet. Water turns debris into a slurry that spreads across the floor and into corners.
Use dedicated cleaning tools for this run. Keep a separate set for isolation or outbreak areas so you never carry contamination back to healthy dogs.
Step 2: Wash With Detergent, Then Rinse
Soap lifts the soil that disinfectant can't penetrate. Fill a bucket with hot water and a detergent such as Dawn or Simple Green, scrub every surface, then rinse with clean water. Skip the rinse and leftover detergent cancels out the disinfectant you apply next.
Watch out: reusing dirty water is the most common shortcut we see. Dirty water just redistributes grime. Dump it and mix fresh.
Step 3: Apply Disinfectant and Let It Dry
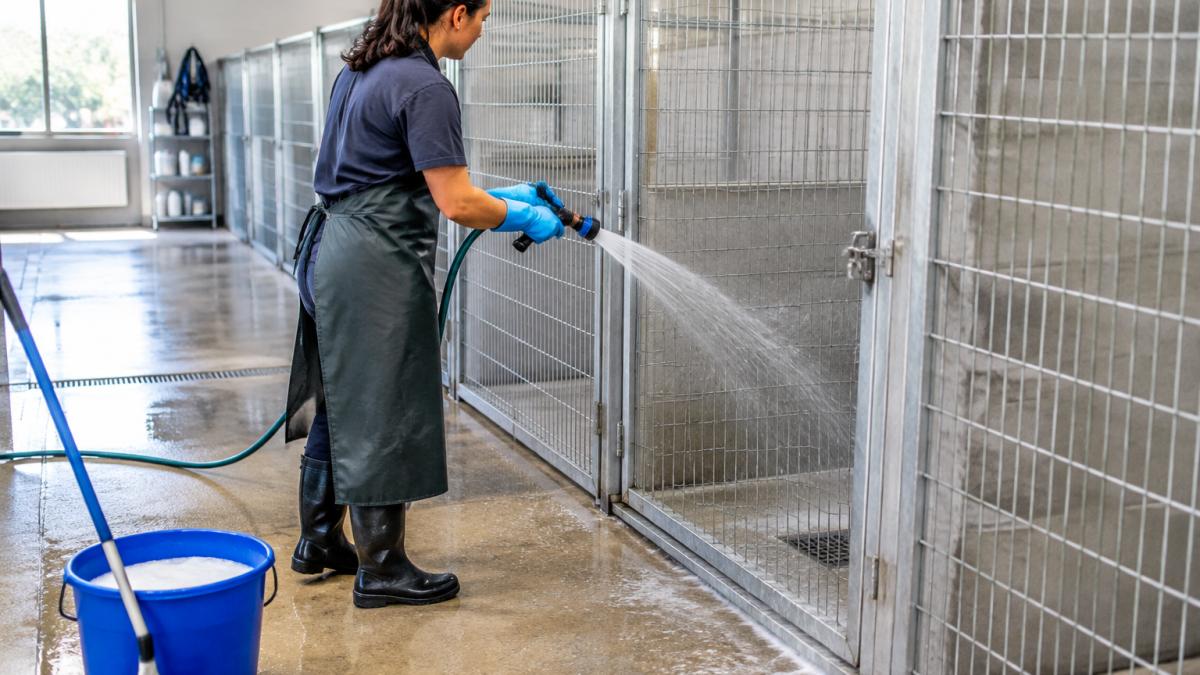
Apply your disinfectant at the label dilution, saturate the surface, and leave it wet for the full contact time. Then let it air dry. Rinsing off a disinfectant before it dries can wash away the protection you just paid for.
Kennel Disinfectant Dilution: Getting the Math Right
Dilution is where good intentions go wrong. A concentrate mixed too weak won't kill pathogens. Mixed too strong, it wastes money, damages surfaces, and puts dogs and staff at risk.
Most kennel disinfectants are sold as concentrates and labeled in one of three ways: a ratio (1:32, 1:64, 1:256), a percentage (0.5%, 1%), or ounces per gallon. All three describe the same thing, how much concentrate goes into how much water, but staff need to see the math once before they trust it.
Here is how the common formats translate into a working bucket:
- 1:32 means 1 part concentrate to 32 parts water. In a 32-ounce spray bottle, that is 1 ounce of concentrate topped up with water. In a gallon (128 ounces), it is 4 ounces of concentrate.
- 1:64 means 1 part concentrate to 64 parts water. In a gallon, that is 2 ounces of concentrate.
- 1:256 means 1 part concentrate to 256 parts water. In a gallon, that is 0.5 ounce of concentrate, easy to over-pour, so use a marked dispenser rather than a measuring cup.
- Ounces per gallon is already a bucket-ready number. If the label says 2 ounces per gallon, measure 2 ounces and fill to the gallon mark.
- Percentage solutions are the trickiest. A 1% solution means 1 part concentrate to 99 parts water by volume, which is roughly 1.3 ounces per gallon for a product that is itself 100% active. Most concentrates are not 100% active, so the label's own mixing table is the only safe source for percentage dilutions.
Measure, don't eyeball. Use a marked measuring cup or the product's own dispenser. Mix only what you'll use that shift, because diluted solutions lose strength over time, especially when mixed with tap water and left in an open bucket.
Label every spray bottle and bucket with the product name, the dilution, and the mix time. A strip of masking tape and a marker is enough.
Watch out: mixing two different concentrates into the same bucket to 'save a step' can create a solution that is neither product at its labeled dilution, and some combinations release dangerous fumes. One product per bucket.
For a ready reference at the mixing station, our EPA-label dilution wall chart shows the verified ratios for Kennelsol, Odoban, and bleach, with contact times for each.

Here is how the common label formats translate into a working bucket.
| Label format | Meaning | In a gallon (128 oz) |
|---|---|---|
| 1:32 | 1 part concentrate to 32 parts water | 4 ounces of concentrate |
| 1:64 | 1 part concentrate to 64 parts water | 2 ounces of concentrate |
| 1:256 | 1 part concentrate to 256 parts water | 0.5 ounce of concentrate |
| Ounces per gallon | Already a bucket-ready number | Measure stated ounces, fill to gallon mark |
| 1% solution | 1 part concentrate to 99 parts water by volume | Roughly 1.3 ounces per gallon |
Kennel Disinfection Contact Time: Why Wet Matters
Contact time is the number of minutes a surface must stay visibly wet for the disinfectant to work. It's not a suggestion.
Here's the part most guides get wrong: contact time is tied to the specific product, its dilution, and its label. There is no universal number.
In practice, keeping a surface wet for the full labeled time is a technique problem, not a knowledge problem.
Work in sections and apply from the furthest corner back toward the door, so you never walk through freshly treated surfaces.
Watch out: porous surfaces, wood, unsealed concrete, worn grout, fabric bedding, absorb disinfectant and dry far faster than sealed surfaces.
Dog Facility Disinfecting Protocol Wall Chart — Industry-Strong Dilutions →
Check coverage by eye, not by memory. Floors, seams where walls meet floors, door frames, latch hardware, and the inside of bowls are the spots most often missed.
If a surface dries too fast, reapply and restart the clock. Do not count the minutes before drying toward the contact time.
Our industry-strong dilution wall chart pairs each product with its contact time so staff can verify the surface stays wet long enough.

Choosing a Disinfectant for Kennel Cough and Other Pathogens
No single disinfectant is best for every situation. The right pick depends on the pathogens you're targeting and your facility's risk level.
Kennel cough is caused by a mix of bacteria and viruses, including Bordetella bronchiseptica. It spreads fast in shared air and on shared surfaces. Parvovirus is far tougher: it survives on surfaces for a long time and resists many common cleaners, which is why outbreak protocols matter.
Match the product to the threat:
- Routine daily cleaning: a general-purpose disinfectant at label dilution
- Kennel cough season or a suspected case: a product labeled for the relevant organisms, used at full contact time
- Parvo or ringworm outbreak: a dedicated outbreak protocol with isolation, PPE, and a proven product
Never mix chemicals. Bleach plus other cleaners can release dangerous fumes. Keep a "never mix" list posted at the mixing station.
Your Dog Kennel Cleaning Checklist for Every Shift
A dog kennel cleaning checklist turns a good protocol into a habit. Staff shouldn't have to remember the sequence from memory at 6 a.m. Give them a card, and they'll follow it.
Build one checklist per shift with these items:
- Remove dog, bedding, bowls, and toys
- Bag feces, hair, and food waste
- Scrub with detergent and hot water
- Rinse with clean water
- Mix fresh disinfectant at label dilution
- Apply and keep wet for full contact time
- Air dry before the next dog enters
- Clean and store tools
- Log the task and initial it
Our daily kennel care card gives staff a printable per-shift tracker so nothing gets skipped.
Building a Dog Kennel Sanitation SOP Your Staff Will Follow
A dog kennel sanitation SOP is the written system behind the checklist: who cleans what, with which product, at what dilution, and for how long. Checklists tell staff what to do. The SOP tells them how, and it's what you hand a new hire on day one.
Keep it short enough to read and specific enough to follow. Cover daily cleaning, deep cleaning, chemical mixing, equipment standards, and what to do when a sick dog shows up.
The biggest mistake is writing a 60-page manual nobody opens. Staff resist change when the process is vague. A one-page mixing guide plus a shift checklist gets used; a binder on a shelf doesn't.
The Complete Cleaning & Sanitation SOP gives you a step-by-step template you can adapt in an afternoon, including parvo and ringworm response protocols.

Safety for Dogs, Staff, and the Environment
Chemical safety protects everyone in the building. Disinfectants are pesticides, and they need respect.
- Wear personal protective equipment: gloves, apron, eye protection when mixing
- Ventilate the area while cleaning
- Store concentrates locked and labeled
- Keep dogs out until surfaces are dry
- Never mix products
- Follow local rules for disposing of waste and rinse water
Dogs are sensitive to chemical residue. Rinse food and water bowls thoroughly, and let surfaces dry fully before a dog returns. Staff safety matters just as much: train everyone on the label, not just the bottle color.
Put Your Cleaning Protocol in Writing With a Ready-Made SOP
The gap between a clean-looking kennel and a genuinely disinfected one comes down to three things: the right sequence, the right dilution, and the full contact time.
Building that system from scratch takes time most owners don't have. Our free SOP checklists give you a starting point to formalize your protocol in writing, so your team follows the same steps every shift.
Get started with The Practical Founder for editable Word documents, printable wall charts, and staff sign-off forms that help keep your facility consistent and accountable.
Frequently Asked Questions
How long do kennel cough bacteria last on surfaces?
Kennel cough organisms can survive on kennel surfaces, which is why disinfection matters between dogs. The exact survival time depends on the pathogen, the surface, and moisture. The practical takeaway: assume surfaces are contaminated after a coughing dog leaves, remove organic debris first, then apply a disinfectant at its label dilution and keep the surface wet for the full contact time. Cleaning before disinfecting is what makes the process work, because organic matter shields bacteria from the chemical.
How do you dilute disinfectant for kennel cleaning?
Always follow the product label for the correct kennel disinfectant dilution. Measure concentrate accurately with a dedicated measuring cup, never by eye. Mix only what you need for the shift, because diluted solutions lose strength over time. Use the same dilution ratio consistently across staff so results stay predictable. A wall chart at the mixing station showing exact ratios for each product removes guesswork and reduces errors during busy periods.
What is the difference between cleaning and disinfecting a kennel?
Cleaning removes visible soil, feces, hair, and organic debris using detergent and water. Disinfecting kills pathogens on the surface after cleaning. Skipping the cleaning step undermines disinfection, because dirt and organic matter block the chemical from reaching the surface. The correct order is: remove debris, wash with detergent, rinse with clean water, then apply disinfectant and let it stay wet for the full contact time.
How long should disinfectant stay wet on kennel surfaces?
The required kennel disinfection contact time comes from the product label, not from a universal rule. Different disinfectants and dilutions need different wet times. Apply enough solution to saturate the surface, and reapply if it dries before the time is up. A common mistake is spraying and immediately wiping, which defeats the purpose. Post contact times at the mixing station so staff know exactly how long each product needs.
